I wanted to make a bib out of a dishcloth. Seen once before, I couldn't find a pattern. My in-Laws also have a very similar bib, where the hole is near one end of terrycloth and the hole is lined with ribbing. (The bib also has a train on it and says "all I do is Choo-choo-choo" and it is adorbs. I thought it was decent pattern, but would be better if the hole were in the center so it could be a 2 sided bib(less washing!!!!!)
I have tried 2 other patterns before I settled on this as the winner.
Materials:
1 terry cloth dishrag(mine are actually "Bar Mop" rags from Target..a bit wider and not quite as long)
Rotary Cutter
Rotary Cutter with 12 punches
Rotary Mat
1 cover to something like "I can't believe its not butter" tub **
1 corningware bowl **
Pen
I-Hook
Yarn
Scissors

1. Put the larger diamter bowl down in the center. Trace around it. This will be your 'dotted' line later. IF You don't do this, there is a posibility that later when you actually cut the holes it will be off center in comparison to the hole underneath

2. Place smaller circle within dotted line.

3. Cut small circle with Rotary cutter


4. Use punch rotary to cut the next holes


NOW for Crocheting.
5. First row, single crochet all the way around with I HOOK (if you do not do step 4), you will need to evenly punch through one row of stitches around the circle.
 |
| Right Side |
 |
| Wrong Side - Notice how the Terry cloth turns under |
6. Row 2 - Double Crochet all the way around
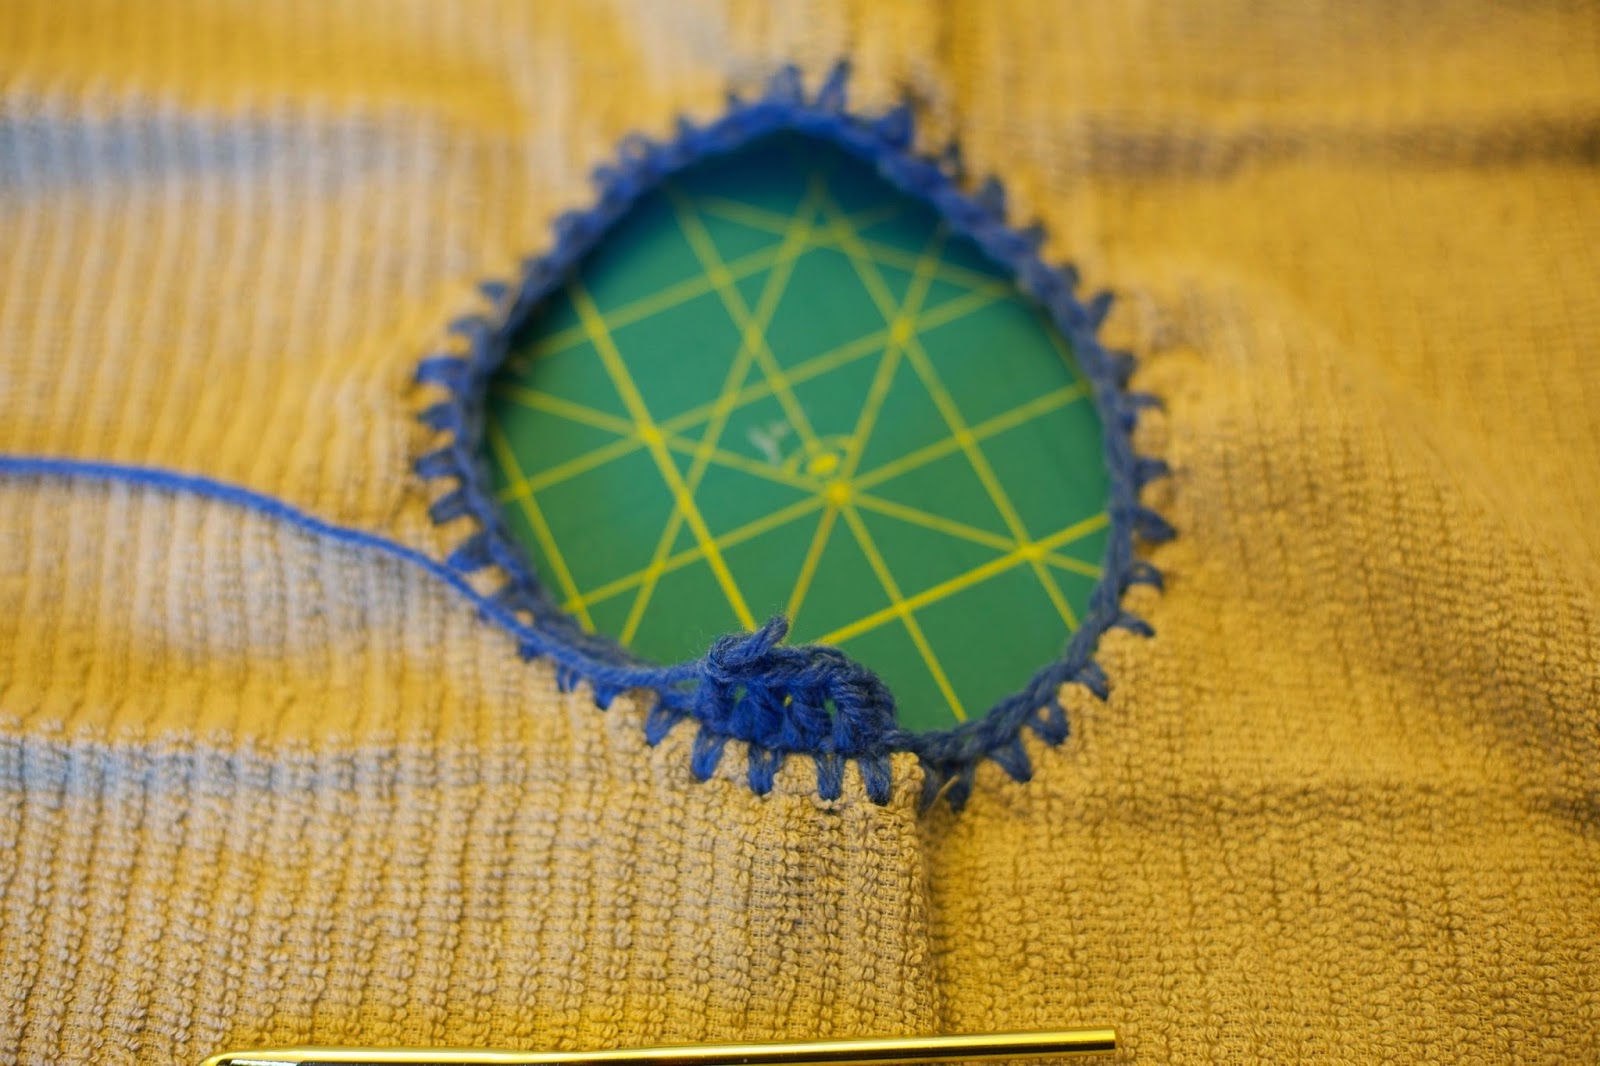
7. Row 3 - { 7 Double Crochets, Crochet 2 loops together} (this makes a slight decrease)
8. Row 4 - Half double Crochet all the way around.
9. Tie off, weave in ends. You are done.
 |
| Right Side |
 |
| Wrong Side |
Here is an earlier finished one with my incredibly adorable model.


**IF someone finds this pattern useful and wants to make it, MSG ME, I'll measure the circumference or diameter of each of the bowls.
****This is my first ever pattern write up. If something is unclear, let me know and I will edit it. ALSO, if you make one, let me know. I'd like to hear of any modifications/adaptations made!
Thanks!